Category Archives: Wargame Terrain

REVIEW: Deep Cut Studios’ Mousepad Gaming mats

Deep Cut Studios are based in Lithuania. They produce a fairly extensive range of gaming and battlemaps using a variety of materials ranging from traditional cloth to magnetized PVC.  All their mats have high quality printed surfaces available in a large range of backgrounds from cobblestones to deep space.  Deep Cut Studios kindly sent me a sample pack of their Mousepad-style maps to review. First off I will give you a description of the samples sent to me and then my thoughts on the product.

When the package arrived I was surprised to see that it got to me despite no street address – just my name and the town/postcode where I live. The joys of living in a small community.

img_6652

The package contained some 20x20cm tiles and a rolled sample piece. Interestingly, even though rolled and in a soft courier package it unrolled dead flat. Actual mats are shipped in cardboard tubes so crushing is unlikely during shipping.

The mats themselves are standard mousepad rubber with the image printed into the surface material. It has a matt finish – my camera flash makes them look a bit shinier than they actually are.

Detail and quality of the printing is good.  I am not sure exactly what the white terrain is supposed to represent – sand or tussock perhaps. It looked a little like the left over wool on the ground where we shear our sheep – just with less sheep crap.

The first thing to note about these tiles (sold separately by Deep Cut for about €1.50 each) is that they sit absolutely flat when placed on a flat surface.  Where two tiles abutted the join was visible but not distracting in any way – at least when I actually aligned them correctly and didn’t sit one on top of the other. I took these photos with the mouse-pad tiles on top of a felt gaming mat so there were quite a few bumps underneath the tiles and I also chose the point where my two 6×6 tables adjoin which mean that the surface underneath was not exactly flat.

I was interested to see how much abuse these could take. I scrunched the sample piece up and left it overnight. In the morning I rolled it out and it sat flat again. Bear in mind this is a sample piece and not a 4×6 gaming surface but once again showed that the material is good at sitting flat.

IMG_6669.JPG

Now – one thing that gamers do sometimes is have a drink sitting on the table. Coffee, coke, beer or even a Quad venti half caf breve no foam with whip two splenda stirred skinny three pump peppermint mocha if you are a hipster gamer from Seattle. And one thing that is sure to happen eventually is that drink being spilled. So, I misread Deep Cut’s claims about this product – I was reading the notes for the cloth mats that said ‘machine washable’. Yes – I machine washed the mouse pad mat and hung it up to dry. It came out fine but if you do spill anything on it I would suggest using a damp cloth to clean it 🙂 

I also used a craft knife and a pair of scissors to cut the material to see if it could be useful as markers for areas of say “difficult terrain”.  With a sharp knife the material cuts easily and cleanly. Even my not so sharp scissors did a good job but I would recommend using a hobby knife if you wanted to use this material for such a job.

My overall impressions of this product are positive. A 6×4′ mouse pad mat is priced at €54.90 plus postage. A smaller 4×4′ mat more suitable for skirmish gaming is a very reasonable €31.90. For these prices you get a light,  easily portable and attractive gaming surface.  Fact is you would be hard pressed to make something yourself for much less than that and I am pretty sure it wouldn’t be as portable or durable.  The exchange rate with the European Peso is also quite attractive at the moment – at least from my part of the world.

The tiles I were sent were all cobblestone road sections and I think would work best with 28mm skirmish gaming tables – Pirates or Sharpe Practice type games as the roads are quite wide. The one design that I couldn’t find on the Deep Cut Studio’s site was a Wild West town – something that I would be particularly interested in as I often take my Wild West skirmish games on the road when I am away from home and want to do some gaming with mates on a weekday evening.

One thing to remember is that these mats present a dead flat gaming surface. Contours and hills would have to be placed on top. For that reason I think that they are best suited for games and gamers who are not too worried about elevation being a three dimensional thing.  Deep Cut do make tiles with hills and so forth that are somewhat reminiscent of the old Battletech game boards if you really need 2-D hills. All their mats can be customised with regards to size and the addition of hexes or grid overlays.

Go to the Deep Cut Studios site and have a look at the range – it is large and there should be something there that you like. I particularly liked the cobblestone mat and the village mat with cobbletone streets. As far as the plain ‘grass mats’ go my only complaint is that the grass looks just a tad out of scale. With buildings and terrain placed on top probably wouldn’t be such an issue to me.

Deep Cut Studios: http://www.deepcutstudio.com/

Facebook: https://www.facebook.com/deepcutstudio

WIP Report: Buildings

I am on leave this week and instead of mowing lawns, pruning trees and helping Mrs Woolshedwargamer in the garden I am painting miniatures and making terrain. A man has to know where his responsibilities lie and prioritize accordingly.
First off. The first piece of Wild West terrain I have worked on in years. This is my sheriff’s office. I ballsed it up right off the bat by getting the height of the verandah roof wrong and most of my miniatures don’t fit underneath it. I am not doing it again so will just have to live with it. It is made of foam core and balsa wood. Windows are glazed with plastic from some piece of random packaging that I found. The corrugated iron is cardboard. Brickwork for the jail part of the Sheriff’s Office is etched into high density styro-foam. Have to add a chimney pipe and then texture the base.

Next up is another Conflix-like building. I did have a bunch of others I made a few years ago but they fell victim to a combination of depression and an open fire. This one will survive I think as I have got my life somewhat under control. Once again foam core board and card. Still to do – all the wooden framing, texturing and roof tiles. A job for tomorrow as it is all glued together and drying at the moment.

Stone Walls – made from stone.

Courtesy of gravel chips off the road when the road was resealed. I swept a few plastic bags full – have enough stone chips for modelling projects for the next hundred years I think.

Balsa wood bases, stone chips glued on with PVA.  When dry spray painted matt black and drybrushed with a grey, then a house paint remarkably similar in colour to GW “Bleached Bone”. Some flock and done.

I had made some stone walls ages ago but left them as natural stone – decided to try painting these ones and was glad I did.  Making these reminded me that I really have to fix some fences on my actual property.

More Conflix-like Buildings

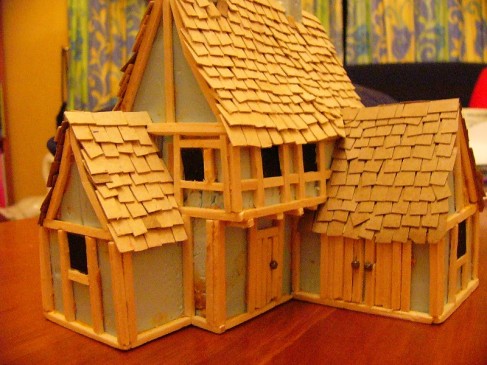
Have not been near a miniature for the best part of two weeks. All I have done is complete three more Conflix-like buildings. All constructed from foam core, balsa and scrap cardboard.  All in all I am pretty happy how these are turning out.

A small merchant’s shop with attached workshop.

Image

Image

A building with a gate house. I showed this as a WIP last week.  I really like this one. It turned out quite well I thought.

Image

Image

Image

And finally a generic building. Finished this one last week but worth another look I think.

Image

The three buildings together.

Image

Slow week at the Woolshed (WIP report)

I have only ‘finished’ one item this week – a building. Needed to do something other than painting miniatures so decided to make a few more buildings for my Conflix-style village. So one building finished and another almost ready for undercoating.

Image

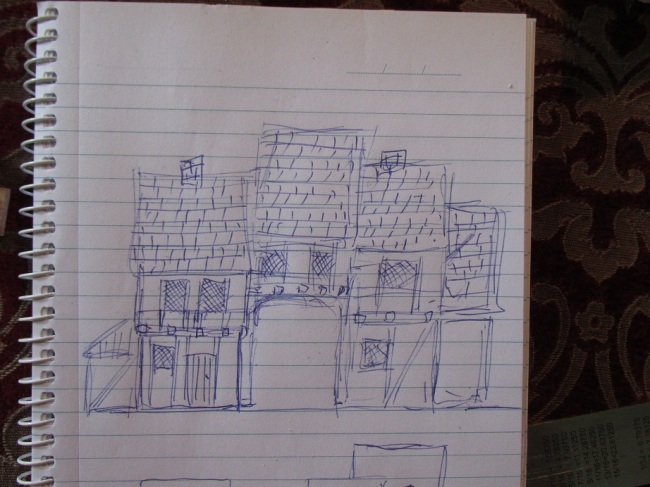
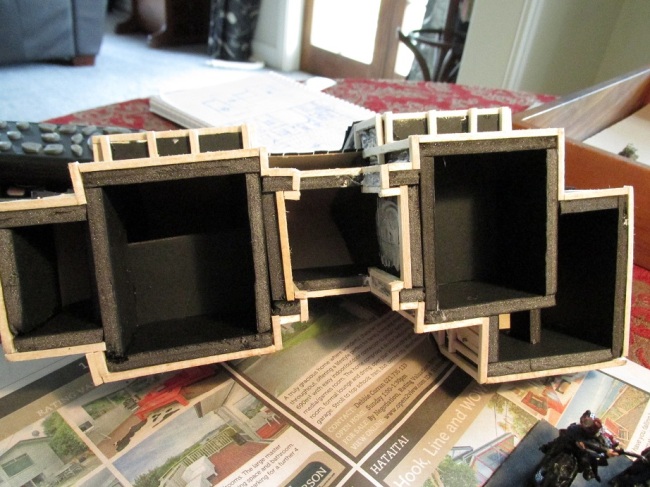
These new structures are made from a body of foam core rather than the insulation polystyrene mentioned in the linked article.  Other than that the techniques used are the same as in the tutorial linked to above. I usually work from a highly detailed set of plans like the one in the picture below.

Image

The interior foam board construction.

Image

Ready for painting.

Image

Also took some time to make some more stone fences. The road outside was being resurfaced and I took the opportunity to fill up a few bags of stone chips. Probably have enough to last me a lifetime of making stone fences. In the background are some French hussars that are also being worked on at the moment – although I should say being sat and stared at because a brush hasn’t been near them in ages.

Image

Bretonnian Henge

This terrain piece was another joint effort between one of my children and I for a school project. At the time my daughter was about eight and was doing a module on Stonehenge.  She wanted me to help her make a model that she could show off at school. They had just visited New Zealand’s own Stonehenge to see a replica henge and she was all inspired.  I think the chances of her and I cooperating on any projects like this now are pretty slim so this model is rather special to me.

Image

Once again we used insulation foam and a base of MDF.  Now we could have made an exact replica of the real Stonehenge, but I persuaded her that a representative ruined henge would be just as good – and I got a decent piece of table top terrain for Warhammer Fantasy battles.

The stone effect on the blocks was produced by the simple expedient of putting the foam onto the concrete path and standing on it.  Seemed to work. Of course, my daughter had to add her very own touch and while her brother was watching TV she sneaked up and snipped off a lock of his hair and used to to make some of the grass tufts we used. Needless to say, he was not happy.

Knights and a Bretonnian Damsel riding through the henge.

ImageThis Bretonnian henge has two large trilithons – visible in this shot.

Image

Bretonnian Knights Errant riding through the shrine to the Old Gods.

Image

A large fallen column lies broken.

Image

Another shot of same.

Image

An overhead shot showing the alter stone in the centre of the henge. Tracks wend their way amongst the ruins of the monument.

Image

The Damsel can draw power from the ancient magic of the stones. Well that is the theory. I haven’t played Warhammer for a while.Image

As a final note – the current state of the Bretonnian Henge is not good. It has fallen into even more ruin. A pesky possum got into the Woolshed and knocked it off the shelf it was stored on and it was somewhat damaged. Well, it was flattened really. All the bits are there so I will repair it. As to the fate of the possum…well possum fur goes for NZ$140 per kilogram at the moment.

28mm Wild West China Town

I have an extensive collection of 28mm Wild West skirmish figures (about two hundred at last count) and have built quite a few buildings for my frontier town. This project started when I was making customised Event Cards for The Rules with No Name – my preferred rules of choice for Western gaming.

Image

I had already painted some Chinese Tong from the excellent Old Glory set XCW-06 Chinese Tong and figured they really needed some place to emerge from when their card was drawn.

The Chinatown was built from foam core, cardboard, balsa and some basswood. The lanterns were made from beads.

This aerial view shows the entire model.  I base my buildings on mdf bases and decided to make this one single terrain piece rather than individually based structures.  From the right you will find a restaurant and laundry, a dwelling, a brothel and Mr Wu’s gambling den and butcher shop at lower left.

Image

Facing the main street we have the Red Dragon Restaurant. Best noodle house east of the Rockies.

Image

Also facing Main St is Chow’s Chinese Laundry.

Image

Between Chows and the Red Dragon runs the muddy alley known locally as Chink’s Alley.Image

Mr Wu is the local provider of meat. As well as sheep and beef there is plenty of game available from his meat cooler.

Image

Of course, another service he provides is body disposal. No-one wants to become food for Wu’s pigs.

Image

The back door of Wu’s place.

Image

And finally some of the local Tong members, ready to fight at the order from their boss.

Image

28mm Conflix-style Medieval Houses

I am away from the Woolshed for nine days – down in Wellington for work. I have delved into the past to find an article I wrote that first appeared on the Kapiti Fusiliers website (now sadly defunct).  Anyways, without further ado…

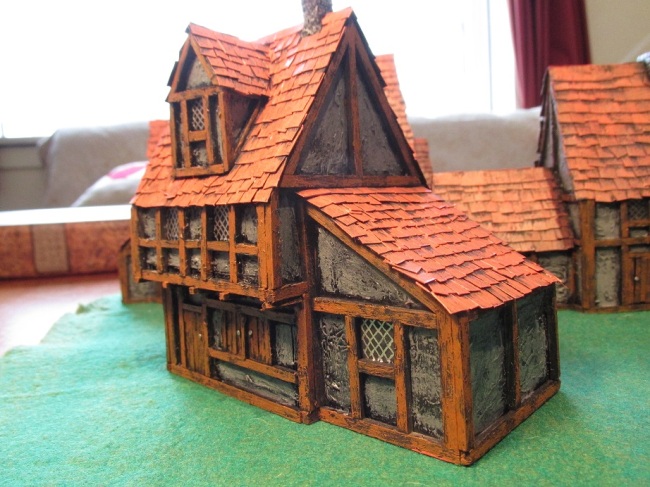
Some time ago I brought a couple of pre-painted Conflix 25mm buildings. They are a little fantasy-ish for many people’s liking but I found them to be exactly what I wanted for my Bretonnian village. I wanted an entire village but thought the cost may have been a little prohibitive so decided that I could make something similar. Here are the results.

Image

I used high density insulation polystyrene for the body of the building. Six months ago I got a 2.4m x 0.6m sheet for NZ$30. Styrofoam is manufactured by Dow Chemicals (in Saudi Arabia) and is available just about everywhere. So far the sheet I brought has built a model Stonehenge, a 28mm Fantasy castle and now two houses and I still have three quarters of it left. For the roof and shingles I made do with card from old note books. Wood was balsa scraps (I never throw anything away and keep all those little pieces left over from basing my figures). For glue I used PVA and Selleys No-More-Nails. The only paint I brought especially for this project was a small test pot of a terracotta colour from the local hardware store for NZ$4.00.

Image

First thing I did was do a few sketches to get an idea of what I wanted to build. In this case I used the Conflix building as a guide for overall size and the angle of the gable. Then I cut the polystyrene into the basic house shape I had decided upon and glued together with No-More-Nails. I do not have a hot wire foam cutter so use a box cutter knife to fashion the styrene instead. You just have to be careful that you don’t pull the blade through the foam or it will pull and not cut cleanly. I used toothpicks to pin the pieces together and to provide support while the glue dried. I cut roof sections from card and glued them to the gable ends.

Image

Then I cut balsa into strips and glued it around the body of the house to form all exterior beams, door and window frames. Door handles were made by using small panel pins pushed into the styrene leaving the head exposed.

Image

Now the really boring bit. Cut 5mm strips from thin card – I used the backing off old note pads. Then snip them to make 5mm x 8mm tiles. You don’t have to be that accurate, just make sure that they are all about the same size. Starting at the bottom of the roof, glue a line of tiles down. Continue doing this up the roof until you reach the ridge. Do the same on the other side of the gable and you just need to glue some capping pieces along the ridge.

Image

I had tried to find some wire mesh of about the right size to use as lead light window panes but could not find anything around the house or for a reasonable price at the hardware store. So instead, I glued card into the window openings with the intention of just painting the lead lights later. At this stage the construction phase of the project was finished.

Image

Now it was time to add a bit of texturing. All I did was smear some Selley’s No-More-Gaps on the wall with my finger. Any excess that got on the timber beams can be trimmed off later before painting. For the chimney, I cut a small rectangular piece of foam about the size I wanted. Then I cut a notch for it to fit onto the roof and glued it in place with No-More-Nails. When it was dried I shaped i with craft knife and then etched the stone shapes in with a pencil.

Image

Now the building is finished it is time to paint. Although it is tempting to spray paint the model, unless you have an airbrush I would not recommend it as a way of applying the first coat. The solvents in the spray paint do a fine job of dissolving polystyrene. So, the best thing is to apply a coat of paint over all the exposed styrene first with a brush. After that you can happily spray coat the rest of the building. I used a can of black automotive spray undercoat.

Image

I wanted my building to look like the Conflix ones that I already had, so I painted and dry-brushed the walls grey, the timber beams using GW Vermin Brown and the tiles with a terracotta house paint to match. The results do not look too shabby.

Image

The finished product (right) standing alongside its Conflix counterparts.