My friend Roy Martin from Wellington, New Zealand provided me with this excellent tutorial on making home-made ACW artillery pieces. Roy is a 1/72nd scale gamer and plays a lot of ACW and Napoleonics in this scale. Here is a link to a previous wargame report supplied by Roy.
Anyway, without further ado I present Roy’s ACW Artillery Tutorial.
Tutorial
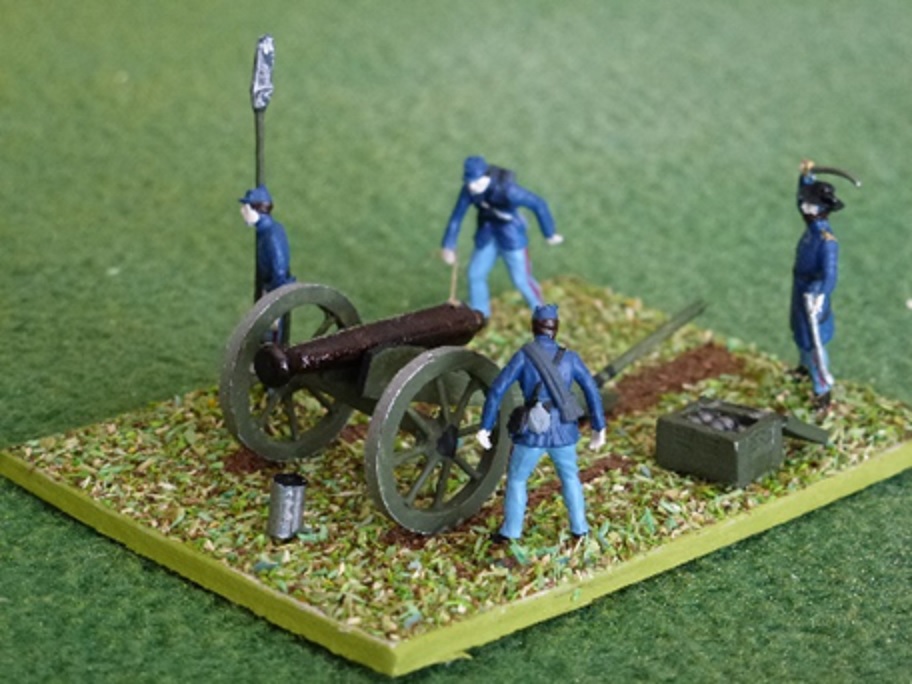
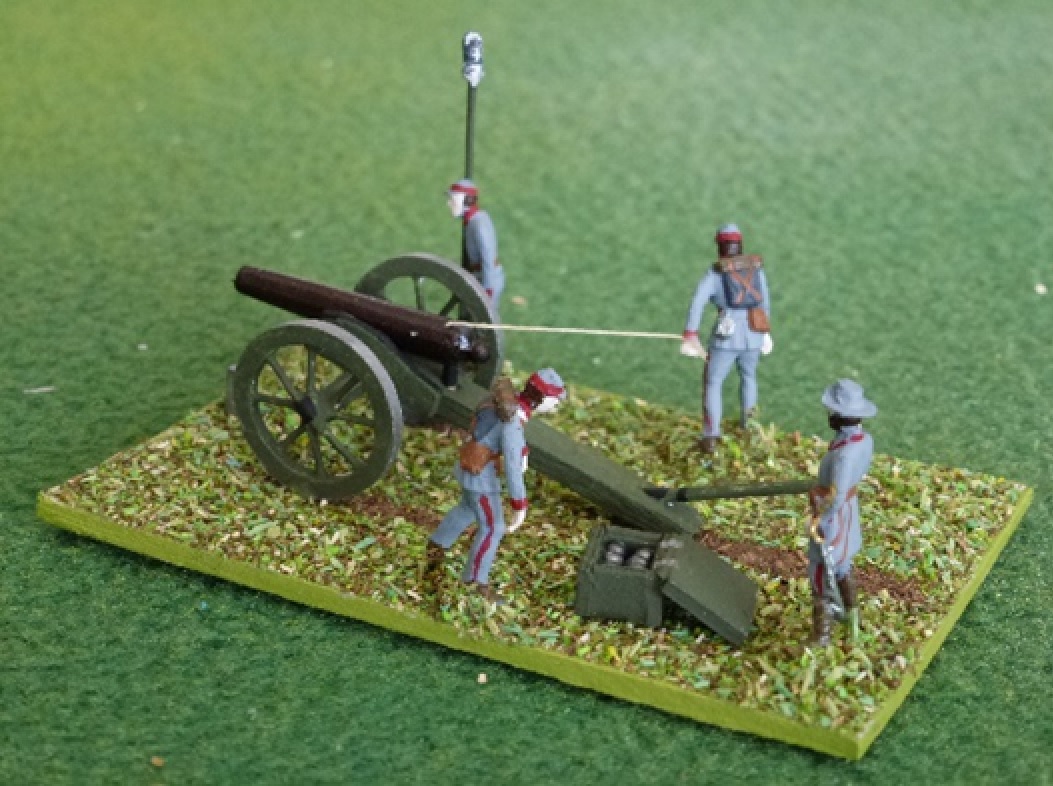
Scratch Building an ACW 12 pounder ‘Napoleon’ Cannon in 20mm scale
By Roy Martin
After having had to make my own cannons for reasons I won’t go into, and having shared the photos of the end results with selected individuals who I thought would be interested, it was suggested that I create a tutorial on the making of them, so here goes nothing.
As both sides used these cannon as their ‘workhorse’, they are an easy option, with the only difference being that the Union used ones with barrel flares and the Confederate ones didn’t.
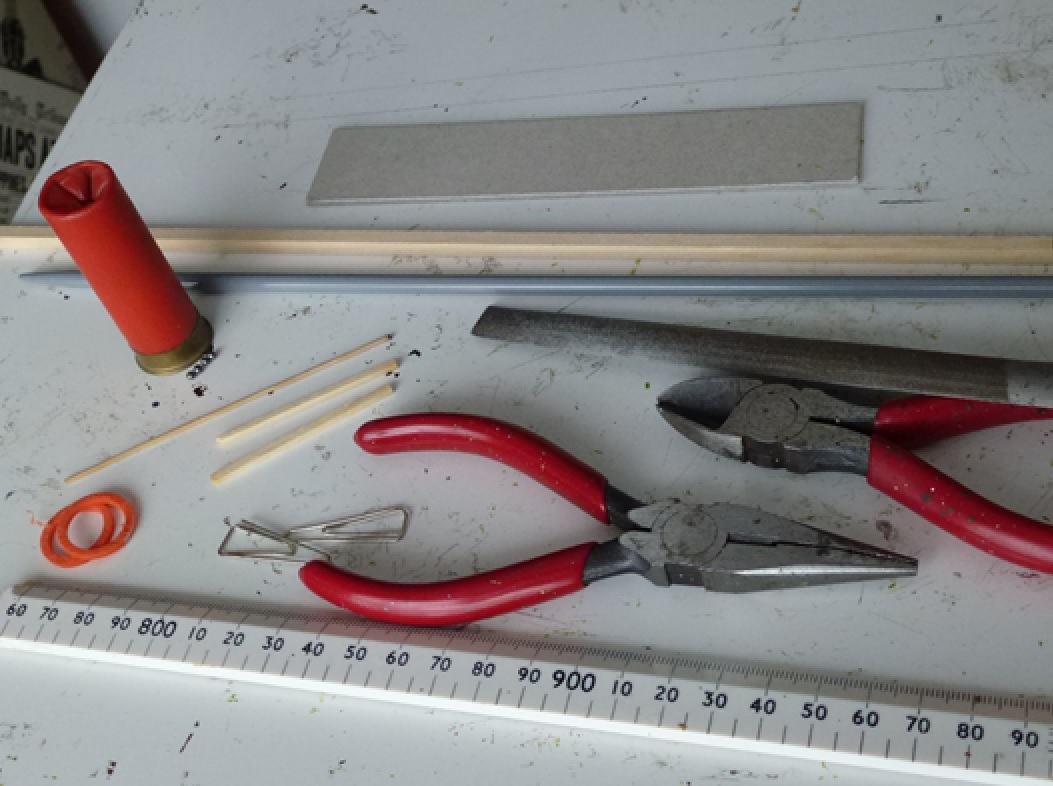
Materials Required:
A length of 19mm Dia. Conduit
Wire Paper Clips
Matchsticks
A length of 5mm Sq. Balsa
A length of 1mm dowel (the rod from an incense stick)
Some 1mm card
A length of 5mm plastic rod (an old knitting needle)
Some 2mm ball bearings (12 Gauge Shot is perfect)
PVA Glue
The Wheels:
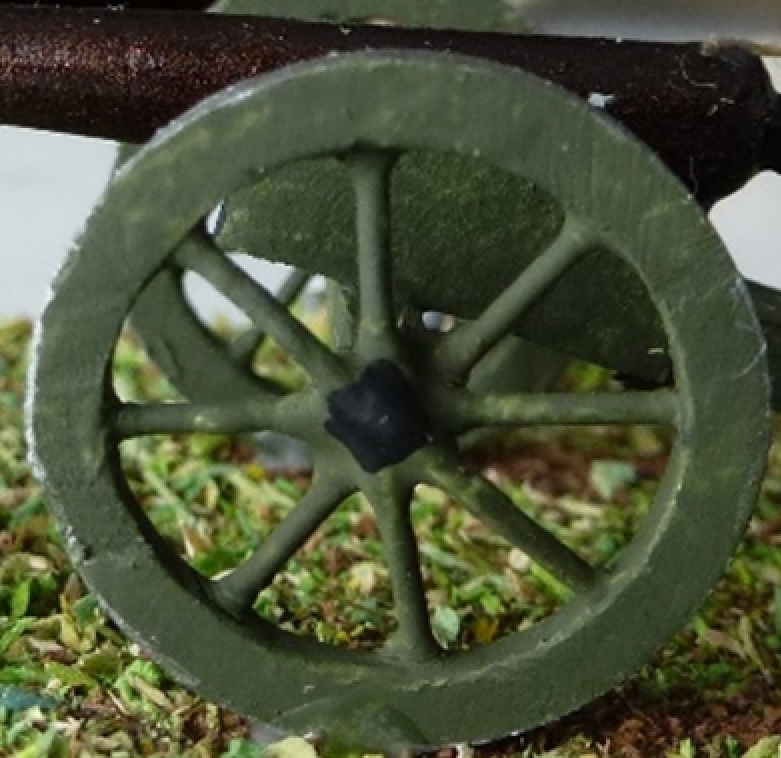
Start by cutting the length of conduit into 2mm rings either with a fine bladed hacksaw or if you are lucky enough, a modelling bench saw. Then sand the surfaces smooth with a bit of old 60 grit paper– this can be hard on the fingers.
Next, take some wire paper clips and straighten them into a single length, which I do by using a pair of small pliers. These will be the spokes, of which there are 4 lengths making an 8 spoked wheel. To add any more spokes to the wheel is impractical, as it bulks out the hub area to an unmanageable and unsightly degree. The first one should be cut to fit snugly inside the rim (in this case 14mm) and pressed into place (I use the end of my short needle nose pliers) with a drop of PVA to secure it. The remaining lengths are cut about 1mm longer to allow for the slight bend required so that the subsequent spokes will surmount previous ones with the ends still fitting within the rim, and fitted in the same manner by pressing them into place. The easiest way of applying the bend is simply to hold the wire in a pair of pliers at the half way point and apply a bit of pressure with your finger as it bends very easily. The amount of bend you will learn by trial and error, but it isn’t much (see below). Remember that they need to be a tight fit so when you cut them, if necessary be generous – as they say, there is a taking off tool, but not a putting on one. You will need to install them from alternate sides of the wheel, so as to balance the fitting process and the look of the finished wheel.
When this is completed (and you have stopped cursing me) the centre of the spokes can be filled with modelling ‘bog’, or I prefer to just add PVA drop by drop letting each drop dry before adding the next. When all this is done then the wheels can be glued to the axle, being a 20mm length of matchstick.
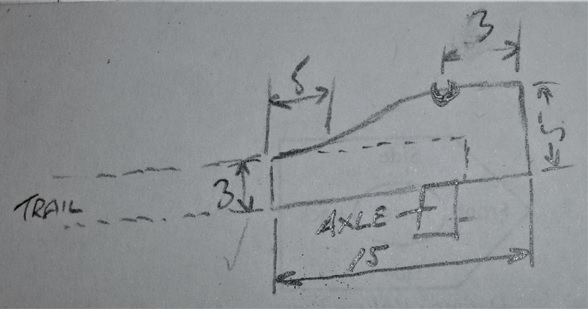
The Carriage:

This is the easy bit as they are a single trail unit. Start with a 5mm Sq. length of Balsa (or similar) cut to 40mm. This need to be trimmed down to 3mm for height and slightly rounded for the end on the ground to create the ‘skid’. From about 12mm of the other end, take a short (5mm) length of 1mm dowel make a small hole (a thin nail will do if using Balsa) and press through the trail to sit proud on the top side – this will be the adjusting screw under the barrel. At about 8mm from the ‘skid’ end, take about 22mm of the same 1mm dowel and once again make a guide hole and push through the trail at an acute angle so that it will poke out rearwards by about 18mm – this will be the ‘laying lever’ which both armies left permanently attached during combat.
The Barrel:
This is easier than it first appears. First acquire a length of 5mm plastic rod (don’t just steal one of your wife or mums knitting needles as you will quickly learn a new meaning to ‘pain and suffering’).
I then mark a 25mm length and clamp the rod in a vice (using something to ensure the rest of the rod isn’t damaged by the vice teeth e.g. some thin bits of timber), with what will be the filed end closest to the vice allowing a bit of space for working the file. I use a small half round 2nd cut file by preference (but it’s up to you). You then have to slowly file a taper onto the rod leaving the far end at 5mm and the other tapered down to 3mm. This is where you have to take it easy, as it is SO easy to over file one spot, as you have to file a bit; turn the rod and file another bit, and so on, until you are happy with the result, or are once again cursing me. In the case of the union barrels, you need to allow a few mm at the end for the barrel flare (this is why I use the half round file) which should be about 4mm Dia. Once you are happy (well sort of) then carefully cut the barrel off with a fine bladed hack saw (and try not to lose it on the floor amongst the rubbish!).
From here, all that is required is to carefully sand or file the ‘breech’ end of the barrel to a rounded state, leaving a small flat area at the end. The final touch for the barrel is the addition of a 2mm ball bearing (or a piece of 12 gauge shot if you have it) glued to the breech end as the finial.
Construction:
As if you really need to be told this. Glue the axle and wheel assembly to the underside of the head of the carriage trail. Paint the carriage and barrel at this point. Glue the barrel in position with the breach end just past the ‘adjusting screw’.
Accessories:
The water bucket is simply a 5mm offcut from an old piece of 2mm model sprue.
The ammo box is just made from 1mm card, and is 10mm ![]() x 8mm (d) x 5mm (h). It has a packed out base and holds 6 x 2mm ‘cannon balls’ (or 12 gauge shot), with a lid 12mm x 8mm.
x 8mm (d) x 5mm (h). It has a packed out base and holds 6 x 2mm ‘cannon balls’ (or 12 gauge shot), with a lid 12mm x 8mm.
If you would like to download a PDF you can do so here.


Leave a comment